
Fun and necessary van life projects transform a bare metal box into a personalized home on wheels, and the best ones do double duty: they solve real problems while making your space genuinely enjoyable to live in. Whether you’re building out your first van or upgrading after years on the road, focusing on projects that blend practicality with pleasure keeps you motivated through the work and satisfied with the results.
I learned this the hard way during my first build when I spent three weeks perfecting a complicated electrical system but neglected to add any personality to the space. Sure, my lights worked flawlessly, but coming back to that sterile box after a day of hiking felt deflating. The turning point came when I installed a simple spice rack and some string lights in a single afternoon. Suddenly, cooking dinner became something I looked forward to instead of a chore squeezed between parking spots.
The magic happens when you stop seeing projects as either fun or functional and start asking which ones can be both. That magnetic knife strip isn’t just practical storage; it’s a conversation starter. Your portable outdoor shower setup doesn’t just solve hygiene challenges; it creates those golden hour moments rinsing off after a beach day that remind you why you chose this lifestyle.
In 2026, the van life community has moved beyond the Instagram-perfect buildouts that prioritize aesthetics over livability. Today’s most successful van dwellers focus on projects that earn their space through daily use while reflecting their unique personalities and travel styles.
What Makes a Van Life Project ‘F&N’ (Fun AND Necessary)
You know that feeling when you spend an entire weekend installing something in your van, only to realize you hate using it? Or worse, you build something gorgeous that serves absolutely zero practical purpose while your clothes pile up on the floor because you still haven’t created proper storage?
That’s exactly what the F&N framework helps you avoid.
F&N stands for Fun AND Necessary, the sweet spot where enjoyment meets functionality. These are projects that genuinely solve a problem you face daily in your van while also bringing you satisfaction to build, use, or look at. Think of a custom spice rack that not only organizes your cooking essentials but also displays them beautifully. Or a fold-down desk that creates a proper workspace when you need it and disappears completely when you don’t.
The beauty of F&N projects is they create momentum. When you complete something that both works brilliantly and makes you smile, you’re energized to tackle the next upgrade. Compare that to forcing yourself through tedious but “essential” builds, which leads straight to burnout. I’ve watched too many new van lifers drain their enthusiasm on purely functional projects, then quit before their space feels like home.
This approach also keeps your van evolving naturally with your lifestyle. As you discover what you actually use versus what you thought you’d need, F&N projects adapt. You’re not just building a van, you’re creating a space that sustains you mentally and practically for the long haul. That’s the difference between surviving van life and genuinely thriving in it.
Storage Solutions That Actually Spark Joy
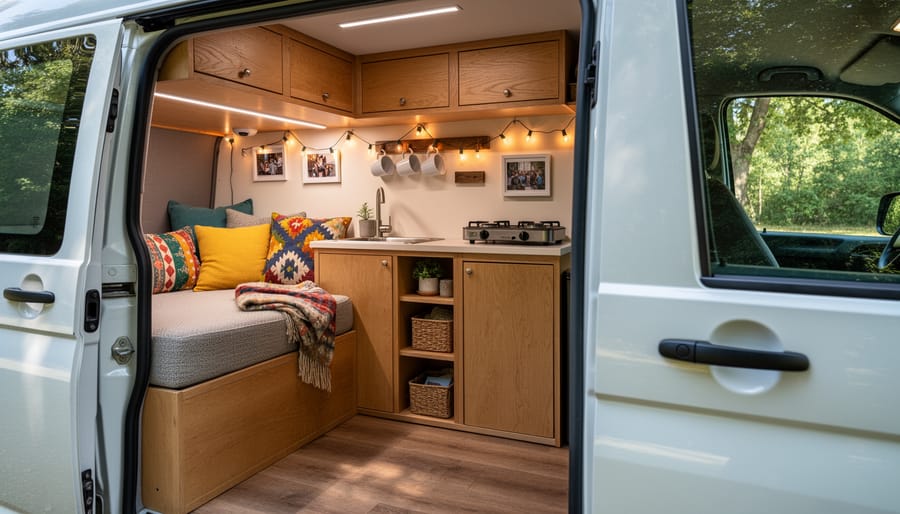
The Weekend Warrior Projects
You know that Saturday when you wake up, drink your coffee in the van, and think, “I could actually fix this storage mess today”? These projects are for exactly that moment.
Start with magnetic knife strips mounted to the inside of cabinet doors. Fifteen minutes, a power drill, and you’ve got instant knife storage that doesn’t rattle around in drawers. I mounted mine vertically on the inside of my spice cabinet door, and now my paring knife, chef’s knife, and scissors have a home that doesn’t terrify me every time I open the cabinet.
Tension rod dividers transform chaos into organization. Grab adjustable shower curtain rods from any hardware store and wedge them vertically in cabinets to create dividers for cutting boards, baking sheets, and pot lids. Cost: about $12. Time: literally five minutes. Life improvement: massive.
Adhesive hooks are the unsung heroes of van storage. Stick them inside closet doors for hanging mugs, on the ceiling for lanterns, or behind the driver’s seat for jackets. The 3M Command variety holds up surprisingly well to temperature swings and won’t damage your walls when you rearrange (because you will rearrange, trust me).
Collapsible fabric bins with labels are another game-changer. Measure your under-bed or overhead spaces, order bins that fit, and suddenly everything has a category. Socks go in socks. Cables go in cables. Revolutionary concept, I know, but it works.
Statement Pieces That Store
The vintage toolbox I scored at a flea market for fifteen bucks now holds my entire coffee station, grinder, beans, filters, and mugs. Every guest asks about it, and honestly, I’m smiling every morning when I brew my first cup.
That’s the magic of statement storage: pieces that make you genuinely excited about organization. A reclaimed wine crate mounted on the wall becomes your spice library. Old leather suitcases strapped to the ceiling store rarely-used camping gear while adding that explorer vibe. I’ve seen vanlifers transform salvaged apple crates into modular shelving that looks like it cost hundreds but ran maybe thirty bucks total.
The key is hunting for pieces with character, think estate sales, architectural salvage yards, or that weird antique mall your grandma loves. Look for solid construction and interesting hardware. Then customize them: add rope handles, stain them to match your interior, or mount them creatively. My buddy Sarah turned an old card catalog into her clothing dresser, and it’s legitimately the coolest storage solution I’ve seen on wheels.
These projects take more time than weekend builds, but they transform your van from generic to distinctly yours.
Comfort Upgrades You’ll Use Every Single Day
Sleep System Upgrades
Here’s my sleep setup confession: I spent my first three months in the van waking up drenched in sweat, convinced I’d made a terrible mistake. The culprit wasn’t the mattress itself, but the solid platform underneath that trapped every bit of moisture and heat like a sauna nobody asked for.
The fix changed everything. I drilled a grid of one-inch ventilation holes through my bed platform, spacing them every six inches. Cost me maybe thirty dollars in a hole saw bit, but suddenly I could breathe at night. That moisture control through ventilation isn’t just about comfort, it prevents mold from turning your sleeping area into a science experiment.
For the mattress itself, skip the memory foam unless you enjoy sleeping on a damp sponge. I switched to a latex topper over a slatted base, and the difference was immediate. Some vanlifers swear by those folding mattresses that double as couches, which work great if you’re tight on space and don’t mind the seam in the middle.
The real game-changer is adding a small 12V fan underneath the bed. Mount it to pull air through those ventilation holes you drilled, and run it on low while you sleep. Costs about fifteen bucks and draws minimal power, but it eliminates condensation completely. Pair that with moisture-wicking sheets, the kind athletes use, and you’ve got a sleep system that actually works in all seasons, not just perfect weather.
Lighting That Sets the Mood
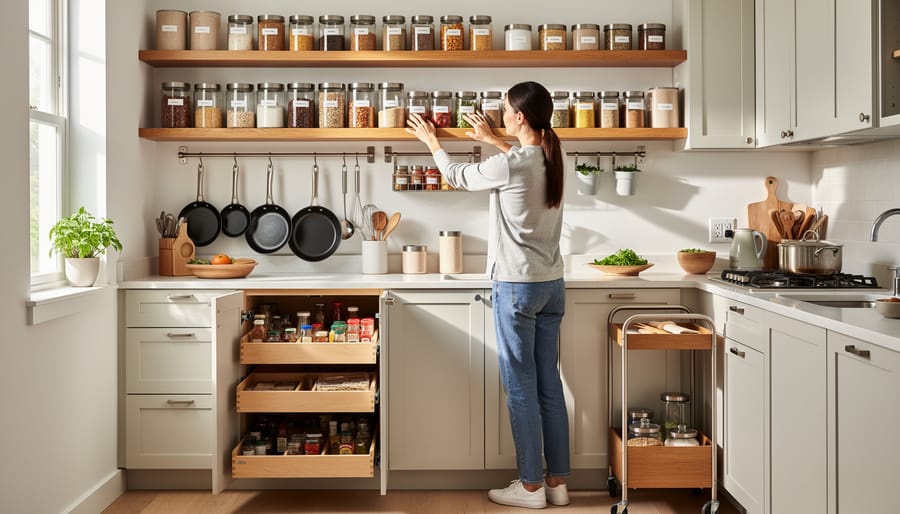
Lighting transforms a metal box into a sanctuary. I learned this the hard way during my first winter in the van, relying solely on a harsh overhead dome light that made evenings feel like interrogations rather than relaxation.
The game-changer was adding three lighting zones. Warm LED strips under the cabinets created task lighting for cooking without illuminating the entire space. A reading light with a dimmer switch mounted near the bed meant my partner could sleep while I stayed up sketching. And fairy lights strung along the ceiling beam added that cozy factor that makes guests say, “Wow, this actually feels like a home.”
Dimmer switches are non-negotiable. They cost under ten dollars but multiply your lighting options exponentially. Bright for morning routines, dimmed for movie nights, barely-there for midnight bathroom trips. I use inline dimmers on every light circuit, which require zero electrical knowledge to install.
Color temperature matters more than you’d think. Cool white (5000K+) feels clinical and draining. Warm white (2700-3000K) mimics firelight and actually helps you wind down. I keep one cool white strip for detailed work like meal prep, but everything else runs warm.
Motion-activated LED strips under the bed frame have prevented countless stubbed toes and preserved my night vision. Sometimes the best lighting projects are the ones you forget are even there.
Kitchen and Cooking Projects That Feed Your Soul
The Fold-Out Kitchen Hack
The fold-out kitchen is where van life magic happens, you get full cooking capability without sacrificing precious floor space when you’re not using it.
Here’s what works: Start with a hinged cutting board that drops down from your counter edge. Mine’s just a 12×18″ bamboo board attached with piano hinges, but it doubles my prep space when I’m making anything more complex than instant noodles. Cost me twenty bucks and an hour with a drill.
For actual cooking expansion, wall-mounted fold-down tables are game-changers. I built one using fence brackets and a lightweight butcher block from IKEA. It holds my two-burner stove when I’m cooking, then folds flat against the wall. The key is positioning it so you can still access your sink, I learned this after blocking mine in for two frustrating weeks.
The real genius move? Adding a hook system underneath for hanging utensils and dish towels. When everything folds up, those hooks keep my spatulas and pot holders accessible but out of the way.
One warning from experience: reinforce your wall studs before mounting anything that’ll hold weight. My first attempt pulled right out mid-stir-fry.
Water and Waste Systems Made Simple
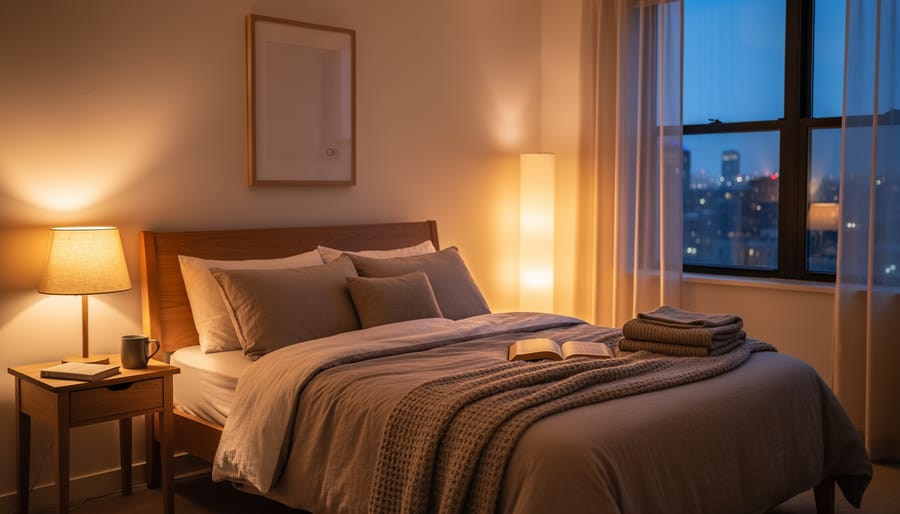
Here’s the beautiful secret about van life water systems: you don’t need to become a plumber to get them right. I spent weeks stressing over complex drain setups before realizing the simplest solutions work best.
For gray water, a basic 5-gallon jug under your sink does the job. Cut a hole in your countertop, add a small strainer, and let gravity do the work. When it fills, you cap it and dump at approved sites. Some vanlifers get fancy with drain valves underneath, but honestly, the jug method means zero leaks and easy monitoring.
Water storage follows the same keep-it-simple philosophy. Multiple smaller containers beat one giant tank every time. They’re easier to refill, you can stash them in odd spaces, and if one springs a leak, you haven’t lost everything. A couple of 7-gallon Aqua-Tainers and a 12-volt pump give you running water without the headache of permanent plumbing.
The game-changer? Clear containers. Being able to see your water levels at a glance eliminates guesswork and prevents those “shower halfway through and the water runs out” moments we’ve all experienced.
Power and Connectivity Projects for Modern Van Life
Solar Power Basics Without the Engineering Degree
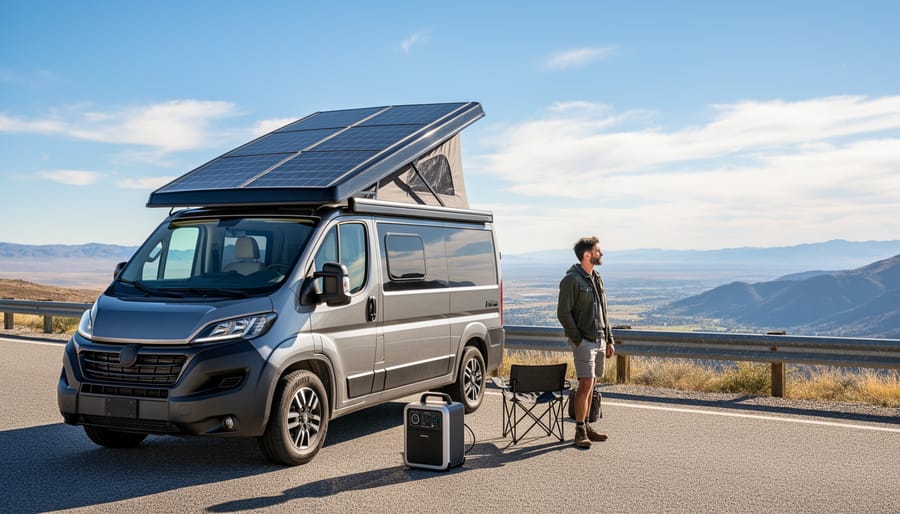
Let’s talk solar without the scary math. Most van lifers start by plugging in at campgrounds, then realize they’re paying $40 a night for a parking spot with a power outlet. That math alone convinced me to try solar.
Here’s the truth: you don’t need to understand volts, amps, and watts to get started. You need three basic things working together, solar panels that catch sun, a controller that manages the power, and a battery that stores it. Think of it like a bucket catching rain. The panel is the funnel, the controller is the regulator preventing overflow, and the battery is the bucket itself.
Start with a 100-200 watt portable kit. These plug-and-play systems come pre-wired and cost $300-600. They’ll run your lights, charge devices, and power a small fan, basically everything except major appliances. I powered my laptop, phone, camera batteries, and LED lights for three months on a single 200-watt panel before needing more.
The beauty of starting small is you learn what you actually use. Track your daily power consumption for a week using your phone’s calculator. Count how many hours your lights run, how many device charges you need, whether you’re running a fan overnight. This real data tells you if you need to expand.
When you’re ready to grow, add another panel and a bigger battery. That’s it.
Connectivity Hubs and Charging Stations
Most digital nomads I know started with charging cables draped everywhere like techno-spaghetti. One friend actually tripped over her laptop cord so many times she named it “The Ankle Biter.”
The charging station game-changer? A simple USB hub mounted to your wall with command strips, paired with a power strip tucked into a slim storage box. Drill a hole in the box side for cables to run through, and suddenly you’ve got a clean charging hub that holds phones, laptops, cameras, and power banks in one spot. Add small adhesive cable clips along the wall to keep cords from dangling into your cooking space.
For WiFi, invest in a cellular booster first before fancy routers. Mount the exterior antenna on your roof rack or magnetic base it to your roof, signal improvement is massive and worth every penny. Inside, a simple WiFi router connected to your hotspot extends coverage throughout the van. Label your charging cables with colored tape so you’re not playing “which cord charges what” at midnight.
Keep this setup part of your essential maintenance routine, check connections monthly and replace frayed cables immediately. A dedicated tech drawer near your charging hub stores backup cables, adapters, and that one dongle you always need but can never find.
Outdoor Living Extensions
Your van’s four walls are just the beginning. The real magic happens when you blur the line between inside and outside, creating zones that let you cook, work, and lounge under open sky.
Start with an awning, it’s the gateway drug to outdoor living. A simple side-mounted awning (around $150 for basic models) transforms any parking spot into an instant patio. I’ve cooked entire meals, worked through rainy afternoons, and hosted impromptu gatherings under mine. The shade drops your interior temperature by ten degrees on scorching days, which means less propane burned on cooling and fewer maintenance tasks to worry about overall.
Next level: the outdoor kitchen setup. A fold-down table mounted to your rear doors becomes a prep station, grill spot, and bar. Add a small propane burner, a water jug with spigot, and a collapsible wash basin. Total cost? Under $80 if you source wisely. The payoff is enormous, cooking outside keeps heat, steam, and food smells out of your sleeping space.
Bike racks and gear carriers deserve serious thought. Rear-mounted racks work for most vans, but roof systems free up back-door access. Either way, external storage for muddy bikes, paddleboards, or camping gear protects your interior from becoming a swamp after adventures.
Don’t overlook the simple stuff. A weather-resistant outdoor rug ($30) defines your space at campsites and keeps dirt outside where it belongs. Collapsible chairs and a small folding table create instant gathering spots. Command hooks on your van’s exterior hold wet towels, climbing gear, or string lights.
The pattern here? Each project pushes your living space outward, making a small van feel surprisingly spacious. You’re not just adding storage, you’re building rooms without walls.
Budget-Friendly Projects Under $100
You don’t need a trust fund to make your van feel like home. Some of the most satisfying projects I’ve completed cost less than a dinner out, and honestly, they’re the ones I use most often. The trick is knowing where to look and being open to creative solutions.
Here are ten impactful projects that’ll transform your space without emptying your wallet:
- Magnetic knife strip and spice rack ($15-25), Hardware stores or Amazon. Mount to any metal surface for instant organization.
- Fabric wall pockets ($20-30), Fabric stores or upcycle old jeans. Perfect for bedside storage and remotes.
- LED puck lights with remote ($25-35), Home improvement clearance sections. Game-changer for mood lighting.
- Bungee cord ceiling net ($15-20), Camping stores. Holds everything from pillows to yoga mats overhead.
- Tension rod curtain system ($30-40), Thrift store curtains work perfectly. Privacy and style in one afternoon.
- Foam board insulation panels ($25-35), Cut to fit problem areas. Huge difference in temperature control.
- Suction cup organizers ($20-30), Dollar stores are goldmines. Windows become storage real estate.
- Removable hooks and hanging strips ($15-25), No drilling required. Damage-free wall organization.
- Collapsible silicone containers ($30-40), Kitchen supply stores. Space-saving food storage that actually works.
- Battery-powered motion sensor light ($25-35), Hardware clearance bins. Hands-free convenience for midnight bathroom runs.
Expert sourcing tip: Check your local Buy Nothing groups and Facebook Marketplace first. Van lifers are constantly upgrading, and one person’s leftover materials become your next project. I’ve scored everything from unused solar panels to perfectly good cabinetry for free.
Also, don’t sleep on habitat for humanity ReStores. They’re treasure troves for hardware, hinges, and building materials at fraction retail prices. The imperfections add character anyway.
One more trick from the road: many of these projects overlap with your regular RV maintenance list. When you’re already buying supplies for upkeep, grab a few extra items for upgrades. You’ll save on shipping and combine your project momentum.
Common Project Pitfalls (And How We’ve All Made These Mistakes)
We’ve all been there, confidently drilling into what we thought was empty wall space, only to hear that sickening crunch of hitting a wire. Or spending hours on a “quick” weekend project that’s now entering week three. Here’s the truth: every van lifer has a mental folder labeled “lessons learned the hard way.”
The most common mistake? Skipping the mockup phase. Sarah from Montana built beautiful custom cabinets that looked incredible but blocked her only window vent. She couldn’t open it without removing the entire cabinet structure. Now she sketches everything with painter’s tape first, living with the mockup for a few days before making it permanent.
Overbuilding is another classic trap. When Tom installed his solar system, he went all-in on capacity but forgot about weight distribution. His van sat tilted until he redistributed everything, costing him weekend camping plans and a realignment. The lesson: start smaller than you think you need, then expand.
Ignoring moisture planning has sabotaged countless builds. That gorgeous wooden feature wall looks amazing until condensation ruins it six months later. Always account for ventilation and water resistance, even in “dry” climates.
The good news? These mistakes teach you more than perfect builds ever could. They help you keep your home rolling by understanding what actually works in real conditions. Every veteran van lifer has remade something at least twice. That’s not failure, that’s evolution.
Here’s the thing about F&N van life projects, they’re never really “done,” and that’s exactly how it should be. Your van evolves as you do. That storage solution you’re so proud of today? Six months from now, you might discover an even cleverer approach during a 2 a.m. brainstorming session at a rest stop.
Start with just one project from this list. Pick something that genuinely excites you, not what looks impressive on Instagram. Maybe it’s those magnetic spice racks that’ll finally stop your cumin from living in three different compartments. Or perhaps it’s the LED mood lighting that transforms your space from “metal box” to “cozy retreat” each evening.
The beauty of this approach is that fun projects keep you engaged with your van’s maintenance needs. When you’re regularly tinkering and improving, you naturally notice what needs attention and prevent breakdowns before they strand you somewhere inconvenient.
Share your projects with the community, the wins, the hilarious failures, and everything in between. We’ve all mounted something upside down at least once. Your “oops” moment might save someone else hours of frustration, and your creative solutions could inspire a complete stranger’s next build.
Remember, perfection isn’t the goal. A van that works for your life, brings you joy, and grows alongside your adventures? That’s what F&N projects are all about.