Your RV maintenance list should be organized by frequency: daily walk-arounds before travel, weekly system checks during active use, monthly deep inspections, and comprehensive annual service tasks. This framework covers everything from tire pressure and fluid levels to roof seals, battery health, and appliance maintenance, ensuring you catch small problems before they become expensive roadside emergencies.
I learned this the hard way three years into full-timing when a forgotten water heater anode rod turned a $20 part into a $1,200 tank replacement. That moment changed how I approached RV upkeep forever. Now I keep a simple checklist taped inside my storage bay door, and I’ve never had another surprise failure since.
The truth is, most RV breakdowns are completely preventable. Unlike a traditional home where deferred maintenance might mean a leaky faucet, neglecting your rolling home can leave you stranded 200 miles from the nearest repair shop with a blown tire, dead batteries, or worse. Regular maintenance isn’t just about protecting your investment, though that matters too. It’s about freedom. When you trust your rig, you can chase that perfect boondocking spot, take the scenic route, or extend your stay without worrying whether everything will work when you need it.
This guide breaks down exactly what to check and when, organized by task frequency so you can build a maintenance routine that fits your travel style. Whether you’re weekend warriors or full-time nomads, you’ll have a practical, actionable checklist you can start using today.
Why an RV Maintenance List Matters for Life on the Road
I learned this lesson the hard way in Nevada’s backcountry. My water pump failed 80 miles from the nearest town because I’d skipped a simple monthly check. What should have been a $30 preventive fix became a $400 emergency repair plus two days of lost travel time. That’s when I created my first proper RV maintenance list.
A systematic maintenance list isn’t just about avoiding inconvenience, it’s essential protection for your mobile lifestyle. When your home moves down the highway at 65 mph, every system faces stress that a stationary house never experiences. Road vibration loosens connections, temperature swings test seals, and constant movement wears components faster than you’d expect. Without regular checks, small issues compound into breakdowns that leave you stranded in places where help is hours away.
Beyond avoiding breakdowns, a maintenance list protects your investment. RVs depreciate rapidly, but well-maintained rigs hold value significantly better than neglected ones. When you eventually sell or upgrade, a documented maintenance history can add thousands to your resale price. I’ve seen buyers walk away from cheaper RVs because the owners couldn’t show basic maintenance records.
Safety matters most, though. Failed brakes, tire blowouts, propane leaks, these aren’t just expensive repairs, they’re life-threatening emergencies. A maintenance list transforms random tasks into a reliable safety system. You’ll catch worn brake pads before they fail on a mountain descent, spot tire damage before a blowout, and identify gas leaks before they become disasters. That peace of mind lets you focus on adventure instead of worry.
How to Use This Maintenance List Effectively
The real power of an RV maintenance list isn’t just having it, it’s using it in a way that fits your life on the road. I learned this after my first month of van life, when I carried a printed checklist that lived crumpled in my glove box and never got checked. The turning point came when I rebuilt my system around how I actually lived, not how I thought I should maintain my rig.
Start by organizing tasks into clear frequency buckets: daily pre-trip checks, weekly walk-arounds, monthly deep-dives, seasonal inspections, and annual professional services. This framework prevents both over-maintenance (wasting time on tasks you just did) and under-maintenance (forgetting critical items until something fails).
Your maintenance priorities depend on several factors unique to your situation:
- RV age and condition, older rigs need more frequent seal and system checks
- Travel frequency, full-timers versus weekend warriors have different wear patterns
- Climate exposure, desert heat, coastal salt, and winter cold each demand specific attention
- DIY skill level, start with tasks you can confidently handle, then expand
- Storage type, outdoor-stored RVs require more frequent exterior inspections than garage-kept units
For tracking, choose what you’ll actually use. Digital tools like RV-specific apps or simple spreadsheets work great if you’re always on your phone. I prefer a dedicated maintenance notebook that lives with my tools, no dead batteries, no internet required, and there’s something satisfying about physically checking off tasks. Some van lifers swear by calendar reminders synced across devices.
The key is making maintenance tracking so simple and accessible that you never skip it. Your future self, stranded nowhere near a repair shop, will thank your organized present self.
Daily and Pre-Trip RV Maintenance Checks
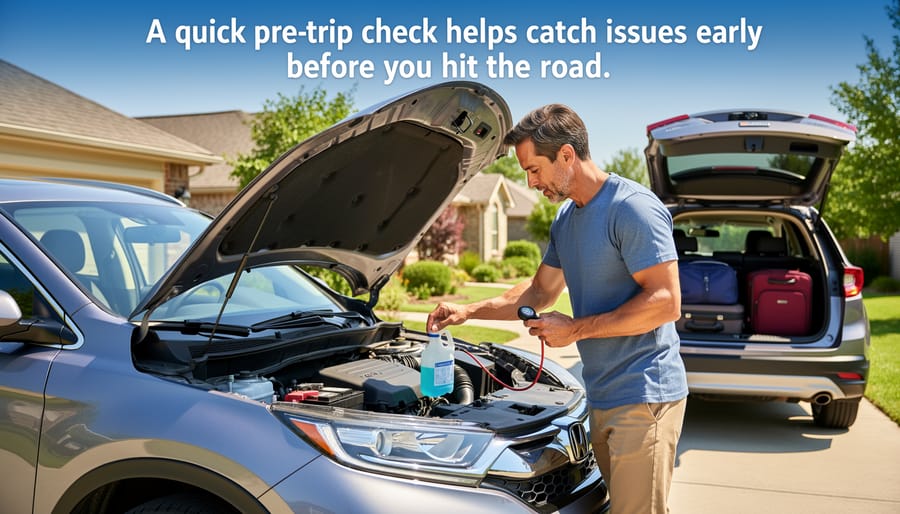
Before you turn the key or release the parking brake, these quick daily checks can save you from roadside emergencies and prevent minor issues from becoming expensive repairs. I learned this lesson the hard way when a blown tire on I-40 could have been avoided with a simple pressure check. Now, my pre-departure routine takes just 15 minutes and has become second nature.
Start your walk-around at the driver’s side front, moving clockwise around your RV. Check each tire’s pressure with a gauge, sidewall numbers show the maximum cold pressure, and you want to stay within your manufacturer’s specifications. While you’re down there, look for cuts, bulges, or anything embedded in the tread. Tires fail more often from improper inflation than wear.
Test every exterior light: headlights, brake lights, turn signals, and clearance lights. Have someone inside flip switches while you verify they’re working, or use a mirror if you’re solo. A burned-out brake light can get you pulled over or worse, cause an accident.
Pop the hood and quickly scan fluid levels, engine oil, coolant, brake fluid, and windshield washer. You’re not doing a full check every day, just looking for obvious leaks or dramatic drops that signal trouble.
If you have slide-outs, bring them in and extend them once to confirm smooth operation. Listen for unusual grinding or hesitation. Check that your awning is fully retracted and secured, nothing ruins a travel day like an awning deploying at highway speed.
Finally, walk the perimeter one more time. Look underneath for fluid drips, check that all compartment doors are latched, and verify nothing’s hanging loose. These five minutes of attention catch 90% of potential road problems before they strand you.
Weekly Maintenance Tasks
Living the van life means weekly maintenance becomes part of your rhythm, right alongside meal prep and route planning. These weekly checks take maybe 30 minutes total but catch small issues before they strand you in the middle of nowhere.
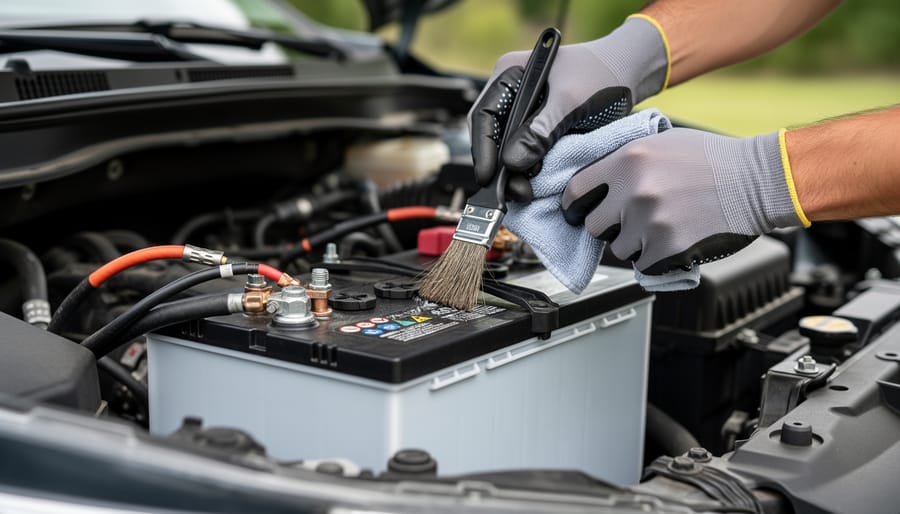
Every week, pop the hood or access panel and check your batteries. If you’ve got flooded lead-acid batteries (not AGM or lithium), verify water levels sit above the plates, low water kills batteries fast. While you’re there, scan for corrosion on terminals and wipe them down if needed.
Your holding tanks need weekly love too. Add enzymatic or bacterial treatments to your black tank after dumping; they break down solids and keep sensors reading accurately. A quick rinse of your gray tank prevents the buildup that creates those mysterious clogs three states away from a service center.
Run your generator for at least 30 minutes under load each week, even if you’re plugged into shore power or relying on solar. Generators hate sitting idle, seals dry out, fuel gums up, and you’ll discover it won’t start exactly when you need it most. I learned this lesson during a power outage at a boondocking spot in Utah.
- Climb up and inspect your roof for debris, leaves, branches, and pine needles trap moisture that seeps into seams
- Pull your refrigerator out slightly and vacuum the coils, dust-caked coils work harder and drain more power
- Check tire pressure again, especially if you’ve moved to different elevations or temperatures have shifted
- Test all lights, including brake and turn signals, since vibration loosens connections
These weekly tasks keep your systems healthy without eating into adventure time. Miss them occasionally and you’ll probably be fine, but skip them consistently and you’re asking for expensive repairs.
Monthly RV Maintenance Essentials
Monthly maintenance is where you catch the small problems before they become expensive roadside emergencies. I learned this during my second month on the road when a cracked seal I’d ignored for weeks turned into a $1,200 water damage repair. Now I treat the first weekend of every month as my deep-inspection day, and it’s saved my sanity more times than I can count.
Start with seals and caulking. Walk around your entire RV checking every seam, window edge, roof vent, and door frame. You’re looking for cracks, separations, or any spot where water could sneak in. Even a hairline crack can channel rainwater into your walls. If you find damage, clean the area and reseal it immediately, a $6 tube of sealant beats replacing rotted wood any day.
Next, tackle your HVAC filters. Pull them out, hold them up to sunlight, and if you can’t see through them clearly, replace them. Clogged filters make your air conditioner work harder, waste energy, and can actually freeze the coils. I keep three spare filters in my storage bay and swap them monthly during summer travel.
Check your fresh water system by running water through all faucets and testing your sanitization schedule. If it’s been more than two months since you sanitized your tank, add it to next month’s list. Stale water tastes terrible and bacteria build up faster than you think in warm climates.
Inspect your propane system connections for any signs of wear, corrosion, or loose fittings. Do the soapy water test on connections, bubbles mean leaks. This five-minute check protects you from dangerous gas leaks.
Finally, verify your brake adjustment if you have electric brakes. Tow your RV a short distance and activate the trailer brakes independently. They should engage smoothly without jerking or pulling to one side.
Seasonal and Quarterly Maintenance
Every three months, set aside a weekend for deeper maintenance that keeps your RV reliable between your more frequent checks. I learned the importance of this seasonal rhythm after ignoring a small roof crack for two quarters, what started as a minor seal issue became water damage that cost me a week of travel time and a hefty repair bill.
Start with your tires, which are literally what keep you moving. Rotate them according to your RV’s manual and measure tread depth with a gauge or the penny test. Tires aged six years or more need replacement regardless of tread depth, so check those sidewall date codes. While you’re down there, inspect wheel bearings for play or noise. If they feel loose or sound grindy when you spin the wheel, repack or replace them before they fail on a mountain pass.
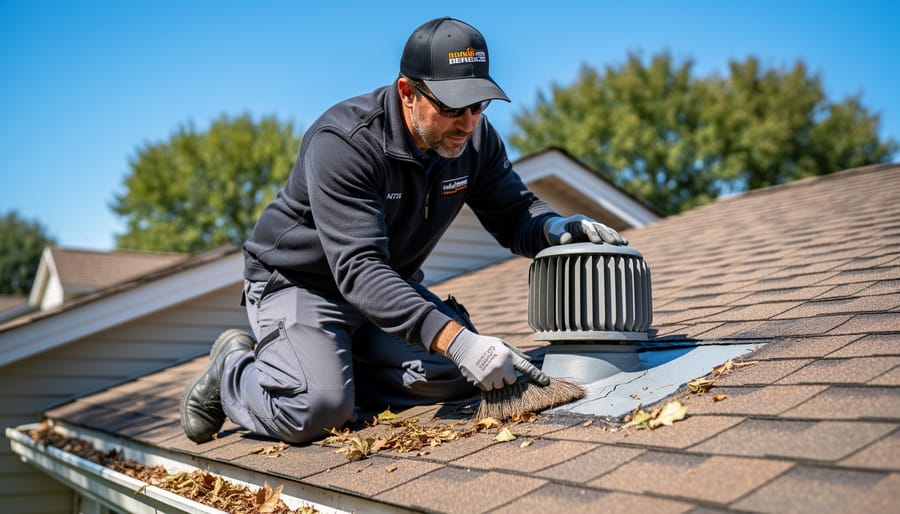
Your roof demands attention every quarter. Climb up with a flashlight and inspect every seal, vent, antenna mount, and edge trim. Look for cracks, separation, or UV damage in the sealant. Reseal any compromised areas with the appropriate product for your roof type, EPDM, TPO, and fiberglass each need specific sealants. This single task prevents more damage than almost any other maintenance item.
Slide-outs need lubrication and adjustment. Clean the tracks, apply slide-out lubricant to the mechanisms, and check that seals aren’t torn or compressed. Extend and retract them fully to verify smooth operation.
Deep clean your awning fabric with proper RV awning cleaner to prevent mildew and extend its life. Inspect the hardware for loose bolts or bent arms while it’s extended.
If you’re heading into winter or emerging from it, this is when you handle winterization or de-winterization procedures, flushing antifreeze, sanitizing water systems, and ensuring tanks and lines are ready for the season ahead.
Annual RV Maintenance Must-Dos
Once a year, schedule a week when you’re not traveling and tackle the big-ticket maintenance items that keep your RV roadworthy for years to come. I learned this the hard way when a skipped annual inspection left me with a $3,000 repair bill that could have been a $150 preventive service. These comprehensive tasks either require professional expertise or benefit from a mechanic’s trained eye, though some you can handle yourself with the right tools and knowledge.
Start by booking professional inspections well ahead, good RV techs fill up fast during peak season. Your chassis and drivetrain need a thorough going-over just like any vehicle: oil changes (following manufacturer intervals, not generic advice), transmission service, differential fluid replacement, and brake system inspection including calipers and rotors. If you’ve got air brakes, they require specialized certification to service properly.
The propane system must be professionally certified annually in most jurisdictions, and for good reason, gas leaks aren’t something to mess around with. During this inspection, technicians pressure-test lines, check regulators, verify automatic shutoff valves, and inspect every connection point. Schedule appliance servicing at the same time: your water heater, furnace, and refrigerator all have components that wear out or need adjustment.
Your annual checklist should include:
- Professional propane system certification and leak testing
- Chassis service: oil, transmission, differential fluids (professional recommended)
- Complete brake system inspection, adjustment, and fluid flush (DIY if experienced)
- Roof membrane condition assessment and major resealing (DIY possible with proper sealants)
- Generator carburetor service and load testing (professional for built-in units)
- Full electrical diagnostic including inverter, converter, and shore power systems (professional)
- Wheel bearing inspection, repack, or replacement (DIY if equipped and experienced)
Don’t skip the roof membrane assessment even if you inspect it seasonally. Once a year, get up there and really examine every square inch for cracks, bubbling, delamination, or UV damage. Small problems caught now prevent catastrophic water damage later. If you’re not comfortable on the roof or lack proper fall protection, hire someone, a tumble isn’t worth the savings.

System-Specific Maintenance: Plumbing, Electrical, and HVAC
Your RV’s major systems need specialized attention beyond general maintenance. Here’s what to check and when to keep your plumbing, electrical, and HVAC running reliably.
Plumbing System Care
Run your water pump monthly for five minutes, even if you’re using city water hookups. This prevents seals from drying out and keeps the diaphragm flexible. I learned this after replacing a seized pump that sat unused for three months.
Clean holding tank sensors every quarter. Mix a cup of dish soap with hot water, fill the tank halfway, then drive around for an hour before dumping. This loosens buildup that causes false readings. Between deep cleans, ice cubes and dish soap work well for black tank sensor maintenance.
Sanitize your fresh water system twice yearly. Use a quarter-cup of bleach per 15 gallons, let it sit for 12 hours, then flush thoroughly until there’s no chlorine smell.
Electrical System Maintenance
Check battery water levels monthly if you have flooded lead-acid batteries. Clean terminals quarterly with a baking soda solution to prevent corrosion. Test voltage regularly, 12.6 volts indicates full charge, below 12.0 means recharging is needed.
Inspect shore power connections every month for burn marks or loose pins. Tighten all visible wire connections annually to prevent voltage drop and potential fire hazards.
HVAC Attention
Clean or replace air conditioner filters monthly during heavy use. Remove the shroud twice annually to clear debris from the condenser fins and check for refrigerant leaks, indicated by ice buildup or reduced cooling.
Test your furnace before cold weather hits. Vacuum the burner chamber and inspect the exhaust vent for blockages. A yellow flame instead of blue signals incomplete combustion requiring professional service.
Creating Your Personal RV Maintenance Schedule
Your ideal maintenance schedule starts with understanding your specific situation. A 15-year-old Class A that’s your full-time home needs a different approach than a weekend-getaway travel trailer. I learned this the hard way with my first van, I followed a generic schedule until a mechanic pointed out I was over-maintaining some things and completely ignoring others that mattered for my older rig.
Start by categorizing your RV: full-time vs. part-time use, age of the vehicle, type of travel (boondocking vs. campgrounds), and your climate. Full-timers should tighten up intervals, moving some monthly tasks to every three weeks. If you’re in coastal areas or dusty deserts, increase your seal and filter checks. Older RVs (over ten years) benefit from more frequent inspections of water lines, roof condition, and electrical connections.
For tracking, choose what works for your brain. I use a simple spreadsheet with columns for task, frequency, last completed, and next due date, plus a notes section for anything unusual I spot. Some folks prefer apps like RV Checklist or Maintenance Reminder. Physical logbooks work great if you’re not screen-focused. The key is consistency, not perfection.
Set calendar reminders two weeks before major tasks so you have time to order parts or book appointments. Build in flexibility, your schedule should guide you, not stress you out when life on the road takes an unexpected turn.
Common RV Maintenance Mistakes to Avoid
I learned this lesson three years into van life when I ignored a tiny water stain on my ceiling. “It’s barely noticeable,” I told myself. Two months later, that innocent-looking spot had become a rotted ceiling panel and $800 repair bill. The van life community has taught me that the costliest mistakes aren’t about what we do wrong, they’re about what we put off doing altogether.
The most common mistakes that trip up RV owners boil down to these:
- Ignoring small leaks until they become major water damage and mold issues
- Skipping annual roof inspections, leading to undetected seal failures
- Focusing only on tire tread while ignoring age, causing dangerous blowouts
- Forgetting to check and reseal windows, vents, and doors regularly
- Delaying slide-out maintenance until mechanisms seize or leak catastrophically
Here’s what catches people off guard: tires can look perfect with deep tread but still be dangerously aged. RV tires should be replaced every five to seven years regardless of appearance, because UV exposure and ozone degrade the rubber from the inside. I’ve met more than one van lifer stranded on a remote highway because they trusted what their eyes saw instead of checking the DOT date code.
Another costly oversight is treating roof maintenance as optional. Your RV roof takes constant abuse from sun, rain, and debris, yet it’s the one thing most owners never see unless they’re actively inspecting it. A fellow van lifer once told me she assumed her five-year-old RV was fine until a routine inspection revealed every roof seal had cracked. The repair cost more than three years of preventive resealing would have.
The pattern is clear: small maintenance tasks skipped become expensive repairs endured.
Essential Tools and Supplies for Your RV Maintenance Kit
Having the right tools on hand transforms maintenance from a frustrating ordeal into a manageable task, especially when you’re miles from the nearest auto parts store. I learned this lesson after spending two hours trying to tighten a loose battery terminal with a butter knife at a remote campsite in Utah. That incident convinced me to build a proper RV maintenance kit, and it has saved countless headaches since.
Your maintenance kit doesn’t need to fill half your storage bay. Focus on essentials that cover the most common tasks from your maintenance list:
- Basic socket set and combination wrenches for tightening connections and adjusting fittings
- Digital tire pressure gauge and portable air compressor for daily tire checks
- Multimeter for testing electrical systems and battery voltage
- Adjustable wrench and channel locks for plumbing quick-fixes
- Caulking gun with RV-specific sealant for roof and window maintenance
- LED flashlight and inspection mirror for checking underneath and in tight spaces
- Lubricants: WD-40, silicone spray for slide-outs, and bearing grease
- Cleaning supplies: RV roof cleaner, awning cleaner, and holding tank treatment
- Spare fuses, light bulbs, and basic electrical connectors
- Duct tape, electrical tape, and zip ties for temporary repairs
Store these supplies in a dedicated plastic bin or tool bag that stays in the same spot. Label it clearly and keep a checklist inside the lid so you know when items need replacing. Mount frequently-used tools like your tire gauge near the door for quick access during pre-trip checks.
Quick Recap: Your RV Maintenance List at a Glance
Your RV maintenance list doesn’t have to feel overwhelming. Start with daily safety checks before each drive, tire pressure, lights, and a quick walk-around take five minutes but prevent roadside emergencies. Build from there: weekly battery and tank care, monthly seal inspections, quarterly deep maintenance, and annual professional service. The beauty of this system is that it scales to your comfort level, tackle what you can, and find trusted mechanics for the rest.
Think of maintenance as your ticket to freedom, not a chore that chains you down. Every seal you inspect, every filter you change, every fluid level you check buys you peace of mind when you’re parked in that perfect boondocking spot or cruising through remote terrain. Regular care means fewer surprises, lower repair costs, and more time actually living the van life instead of hunting for mechanics.
Start small. Pick three tasks from the daily checklist this week. Add a monthly check next month. You’ll find your rhythm, and before long, maintenance becomes second nature, just another part of life on wheels.
Frequently Asked Questions About RV Maintenance
How much time does RV maintenance really take?
Daily checks take five to ten minutes, weekly tasks about 30 minutes, and monthly maintenance usually requires one to two hours. Annual comprehensive maintenance can span a full weekend, but spreading tasks throughout the year makes it manageable alongside your regular travel routine.
Can beginners handle their own RV maintenance?
Absolutely, most routine maintenance tasks like checking tire pressure, cleaning awnings, and inspecting seals require no special training. Start with the simpler daily and weekly checks to build confidence, then gradually tackle monthly tasks as you become familiar with your RV’s systems.
Which maintenance tasks should never be DIY?
Leave propane system certification, brake system overhauls, and roof membrane replacement to professionals. Electrical system repairs beyond basic bulb changes and anything involving chassis welding or structural modifications also require certified technicians to ensure safety and maintain warranties.
How do you find mobile RV mechanics on the road?
Use apps like RV Life and Campendium to locate mobile mechanics, ask for recommendations in campground communities, and join regional van life Facebook groups where locals share trusted contacts. Many full-timers maintain a saved list of reliable mechanics in areas they visit regularly.
What’s the typical annual cost of RV maintenance?
Budget roughly one to three percent of your RV’s value annually for maintenance, which covers routine tasks and preventive care. A $50,000 RV might require $500 to $1,500 per year, though costs vary based on age, usage, and whether you DIY most tasks or hire professionals.
Should I maintain my RV maintenance list differently in extreme climates?
Yes, hot desert environments demand more frequent seal inspections and tire pressure checks, while humid coastal areas require extra attention to rust prevention and mold control. Cold climates need rigorous winterization protocols and battery care to prevent freeze damage.
These questions reflect what I hear most often from newer van lifers who feel overwhelmed by maintenance responsibilities. The truth is, consistent small efforts prevent the big scary breakdowns that sideline adventures. I learned this after ignoring a simple seal check for months, which led to water damage that cost me three weeks parked in a repair lot instead of exploring the Southwest. Your maintenance list becomes second nature once you establish the rhythm, and the time investment pays back tenfold in reliability and peace of mind on the road.