
Installing an ERV (Energy Recovery Ventilator) system in your RV takes about four to six hours and transforms your mobile home’s air quality by automatically exchanging stale indoor air with fresh outdoor air while recovering heating or cooling energy. The process involves mounting the ERV unit, cutting strategic vent holes through your RV’s exterior, running ductwork, wiring the system to your 12V power supply, and sealing everything weatherproof. While it sounds complex, this is one of those RV system upgrades that delivers immediate comfort, especially if you’ve ever woken up to condensation dripping down your walls or struggled with cooking odors that linger for days.
I remember installing my first ERV system during a rainy week at an RV-friendly destination in Ontario. The difference was night and day. The constant battle with humidity vanished, and my partner stopped complaining about stuffy mornings.
The real challenge isn’t the electrical work or even the ductwork. It’s committing to cutting into your RV’s walls with confidence. You’ll need basic hand tools, a jigsaw, appropriate ducting, exterior sealant rated for mobile applications, and about half a day of focused work. Most van lifers who tackle this project wish they’d done it sooner. The payoff in comfort, especially during shoulder seasons when you’re running heat or AC, makes this upgrade worth every minute spent getting it right.
What an ERV System Does and Why Your RV Needs One
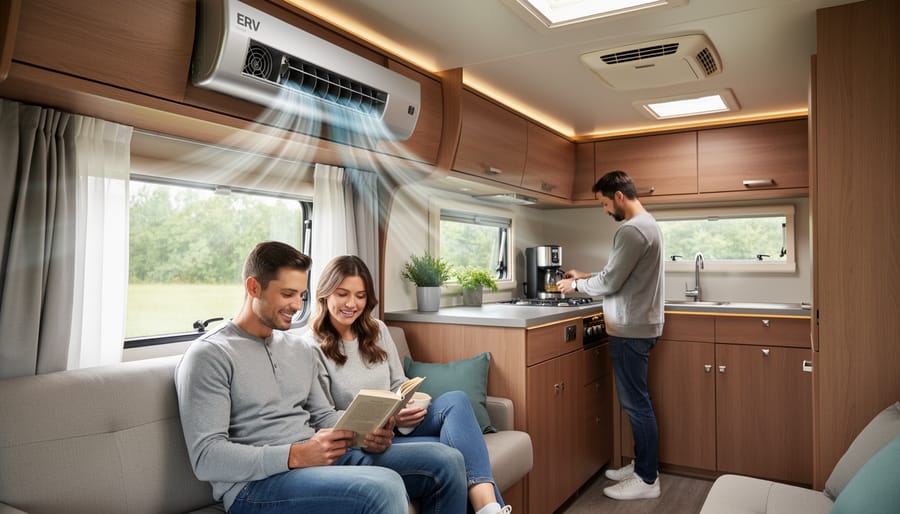
An ERV system is a mechanical ventilator that simultaneously brings fresh outdoor air into your RV while exhausting stale indoor air, and here’s the clever part: it transfers heat and moisture between those airstreams before they mix. During winter, the outgoing warm air preheats the incoming cold air. In summer, the outgoing cool air pre-cools the incoming hot air. This heat exchange happens through a special core that keeps the airstreams separate while allowing energy transfer, which means you get continuous fresh air without the massive energy penalty of just opening windows.
For RV living, this matters more than most people realize until they’ve dealt with the consequences of poor ventilation. That bacon you cooked this morning? Without proper air exchange, those odors linger for hours in your 200-square-foot living space. The shower you took before heading out? That moisture has nowhere to go, so it condenses on cold windows, settles into bedding, and creates the perfect environment for mold growth along ceiling seams and in hidden corners. I learned this the hard way during my first winter in Montana, when I woke up to literal water droplets running down my walls every morning.
Standard RV roof vents and windows offer ventilation only when conditions allow you to open them, which often means choosing between fresh air and maintaining comfortable temperatures. An ERV runs continuously in the background, quietly managing your indoor air quality regardless of outside weather. It addresses the reality that modern RVs are surprisingly airtight, which is great for temperature control but terrible for air quality when you’re cooking, showering, breathing, and living in such a compact space. The system essentially gives your RV lungs that work 24/7, pulling out humidity, cooking fumes, and carbon dioxide while replacing them with filtered fresh air.
Tools, Materials, and What You’ll Need Before You Start
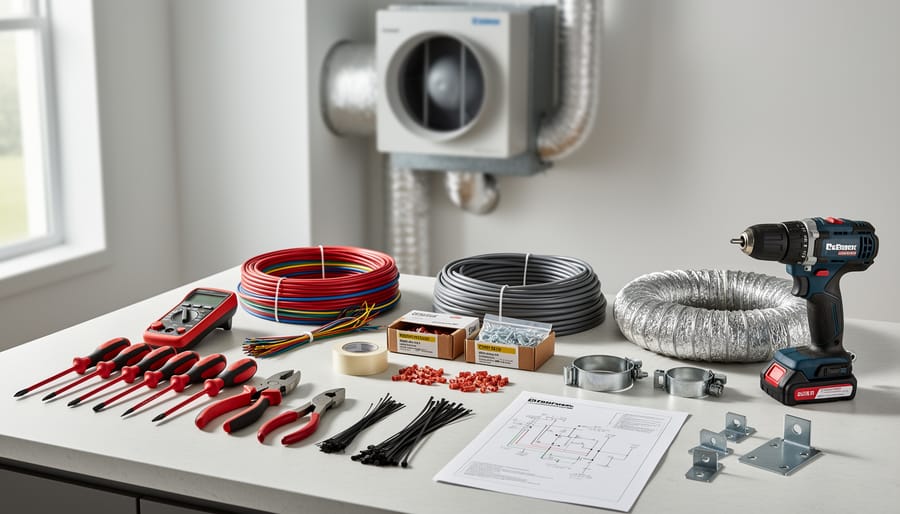
Getting your ERV system installed right starts with having everything you need within arm’s reach. I learned this the hard way during my first install attempt when I was three hours into the project and realized I didn’t have the right size hole saw, cue a frustrating trip to town that turned a one-day job into a weekend affair.
The total investment for tools and materials typically runs between $400 and $900, depending on whether you already own basic tools and which ERV unit you choose. Most van lifers find this falls comfortably within the range of other budget-friendly upgrades that significantly improve quality of life on the road.
Here’s what you’ll need for a complete installation:
- Tools: Variable-speed drill, hole saw set (3-inch and 4-inch are most common), jigsaw, screwdriver set, wire strippers, crimping tool, caulking gun, measuring tape, level, pencil, safety glasses, work gloves
- ERV Unit: Choose a model rated for RV use, typically 12V DC or dual-voltage ($250-$600)
- Ducting: Flexible aluminum or rigid plastic ducting, usually 3 or 4 inches in diameter ($30-$60)
- Exterior Components: Intake and exhaust vent caps with screens and dampers ($40-$80)
- Mounting Hardware: Stainless steel screws, L-brackets, vibration-dampening pads ($20-$30)
- Electrical Supplies: 14-gauge marine wire, inline fuse holder, wire connectors, switch or control module ($25-$50)
- Sealants: Marine-grade polyurethane sealant, butyl tape, silicone ($30-$50)
Most van lifers source their ERV units from marine suppliers or RV specialty retailers like Camping World or Amazon. For hardware and electrical components, marine supply stores carry higher-quality materials designed for mobile applications than typical hardware stores.
Expert tip: Don’t skimp on sealant quality. Marine-grade polyurethane sealants like Sikaflex or 3M 5200 are specifically formulated to handle the constant flexing and temperature swings that RV walls experience. The extra five dollars you spend on quality sealant prevents thousands in water damage repairs down the road. I always keep a backup tube in my van, it’s saved me more than once when doing maintenance in remote locations.
Safety Warnings and Pre-Installation Considerations
Before you grab your tools, let’s talk about the real risks. ERV installation is manageable for many van lifers, but it involves hazards that can turn a DIY win into a dangerous or expensive mistake if you don’t approach them carefully.
Electrical Hazards
You’ll be working with your RV’s electrical system, whether 12V DC or 120V AC. Even 12V systems carry enough current to cause burns or start fires if wired incorrectly. Before touching any wiring, disconnect your batteries and shore power completely. Use a multimeter to verify circuits are dead. If you’re not confident identifying positive and negative leads, calculating proper wire gauge, or installing inline fuses correctly, this is where many van lifers wisely pause and consult someone with electrical experience.
Cutting Into Your RV Structure
Your RV’s walls, ceiling, and floor contain hidden obstacles: wiring, plumbing lines, structural supports, and insulation. Cutting vent holes without knowing what’s behind the surface can damage critical systems. Before you cut anything, study your RV’s layout carefully. Many manufacturers provide wiring diagrams, or you can trace visible systems to predict what runs where. Probe the area with a stud finder and inspect from multiple angles. Go slowly with your first cut.
Working on the Roof
Installing exterior vents often means roof work. RV roofs aren’t designed to support concentrated weight the way residential roofs are. Walk only on structural supports (usually above walls or frames), use a ladder stabilizer, and never work alone. Falls from even a short Class B van can cause serious injury. If your roof feels soft, spongy, or shows signs of previous water damage, stop, you may have structural rot that needs addressing first.
Sealant and Chemical Exposure
Marine-grade sealants (which you’ll use extensively) contain strong solvents. Work in a well-ventilated area, wear gloves, and take breaks if you feel lightheaded. In the confined space of an RV, fumes concentrate quickly. Open windows and doors, and consider wearing a respirator rated for organic vapors if you’re sensitive to chemicals.
RV-Specific Considerations
Van conversions have thin walls and minimal structural framing, so you have less margin for error when cutting openings. Class A motorhomes often have complex electrical systems and slide-out mechanisms that restrict installation locations. Travel trailers have weight distribution requirements that matter, adding 15 to 25 pounds of ERV equipment on one side can affect towing balance if you’re already near your limits. Weigh your trailer before and after if you’re close to your GVWR.
When to Call a Professional
Stop and seek help if you encounter structural damage during your inspection, if your RV is still under warranty (modifications can void it), if you’re uncomfortable with electrical work beyond basic connections, or if you discover your planned installation requires relocating existing systems. A mobile RV tech can often complete the tricky parts while you handle the straightforward assembly, saving you money while keeping the project safe. The van life community isn’t about doing everything yourself, it’s about knowing your limits and building skills gradually.
Planning Your ERV Installation: Location and Layout
Choosing where to install your ERV can make or break your entire project, and I learned this the hard way. During my first attempt, I mounted the unit in what seemed like the perfect spot above the dinette, only to discover it sat directly over our sleeping area and hummed like a refrigerator all night. Three days later, I was relocating everything.
Start by identifying central locations that minimize ductwork length while keeping runs under 10 feet when possible. Shorter ducts mean better airflow and less energy consumption. Many van lifers successfully mount units in overhead cabinets, under dinettes, or in rear storage compartments. The key is balancing accessibility with livability.
When selecting your ERV location, prioritize these critical factors:
- Noise tolerance: Keep the unit away from sleeping areas and work spaces
- Filter access: Ensure you can reach filters without moving furniture or climbing on counters
- Weight distribution: Avoid overloading one side of your RV, especially in van conversions
- Condensate drainage: Plan for moisture removal if your model produces condensation
- Clearance requirements: Most units need 6-12 inches on all sides for proper airflow
For exterior vent placement, position intake and exhaust openings at least three feet apart to prevent recycling exhaust air back into the intake. I recommend placing the intake on your RV’s windward side (typically the front or side) and the exhaust on the opposite end. Avoid mounting vents directly above slide-outs, awnings, or entry doors where they might get blocked or damaged.
Pay attention to thermal bridges, those cold spots where metal ductwork touches RV framing without insulation. In winter camping, these create condensation nightmares. Plan duct routes that minimize penetrations through insulated walls, and always insulate any ductwork running through unheated spaces like wall cavities or wheel wells. Sketch your layout on paper first, measuring twice before cutting anything. This fifteen-minute planning step saves hours of frustration and prevents expensive mistakes.
Step-by-Step ERV Installation Process
Step 1: Mark and Cut Exterior Vent Openings
Before you pick up that saw, take a breath and double-check everything. Cutting into your RV’s exterior is permanent, so measuring twice (or three times) really matters here.
Start by consulting your ERV manual for exact vent dimensions and clearance requirements. Mark the locations you planned earlier using painter’s tape on the exterior, it won’t damage paint and lets you visualize placement before committing. Use a level to ensure your marks are straight; crooked vents look terrible and can affect airflow.
Before cutting, inspect the interior wall cavity. Remove any interior panels in that area and use a stud finder or inspection camera to locate hidden wiring, plumbing, or structural members. I once watched a fellow van lifer drill right into a water line, not fun.
For fiberglass walls, use a jigsaw with a fine-tooth blade and drill pilot holes at each corner first. Go slow to prevent cracking. Aluminum siding needs a metal-cutting blade and steady pressure. Composite panels cut cleanly with a sharp utility knife scored multiple times, then finished with a jigsaw. Wear safety glasses and a dust mask regardless of material.
Support the cutout section from inside as you finish to prevent it from falling and damaging anything below.
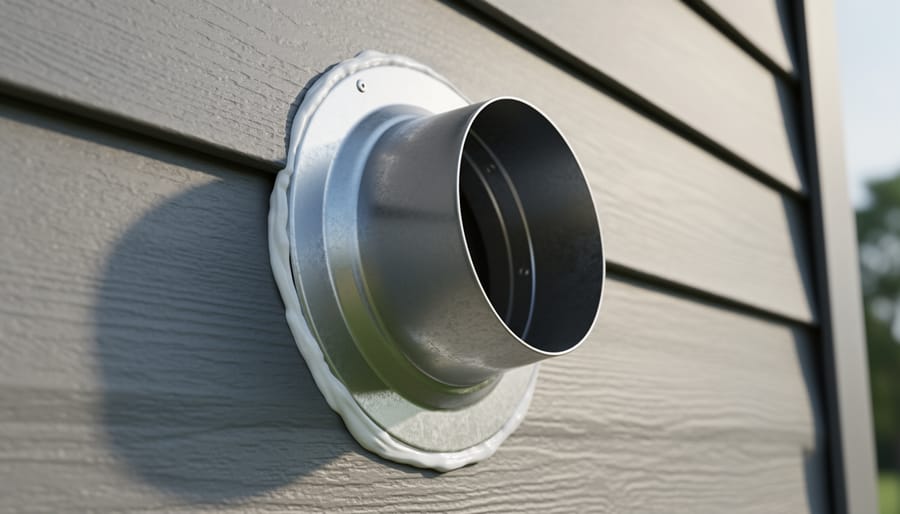
Step 2: Install Exterior Vent Caps and Seal Properly
With your vent openings cut and debris cleared, it’s time to mount the exterior caps and create a watertight seal. This step is where most water leaks originate, so patience here pays dividends during the first rainstorm.
Start by doing a dry fit of each vent cap. Hold it in position and check that the mounting flange covers your cut edges completely with at least a half-inch overlap all around. Mark your screw hole locations with a pencil.
Here’s the critical sequence: apply a continuous bead of marine-grade sealant (Dicor or Sikaflex are van life favorites) along the back edge of the flange, about a quarter-inch from the outer edge. Don’t skimp, but avoid globs that will squeeze out excessively. Press the cap firmly into position, then drive your screws through the flange into the RV exterior. The compression will spread the sealant evenly.
After securing all screws, run another bead of sealant along the top edge of the flange where it meets the RV surface. This double-seal method is your insurance against the bouncing and flexing that comes with mobile living.
Let the sealant cure for the manufacturer’s recommended time (usually 24-48 hours) before driving or exposing it to weather. I learned this the hard way when light rain hit six hours after installation and created small gaps that took weeks to diagnose.
Step 3: Mount the ERV Unit Inside
With your exterior vents sealed and ready, it’s time to mount the ERV unit itself, and this step is where careful planning pays off.
Start by holding the unit against your chosen mounting surface to mark screw locations. Most ERV units come with a mounting template, which makes this process straightforward. Use a level to ensure the unit sits perfectly horizontal; an unlevel installation can cause condensation drainage issues and increase vibration noise while driving.
For mounting to interior walls, locate studs or backing boards whenever possible. If your van conversion has thin paneling, you’ll need to add backing support, a piece of plywood secured between studs works well. I learned this the hard way when my first attempt pulled loose on a bumpy forest road.
Weight distribution matters more in RVs than in houses. Position heavier units lower and toward the center of your rig when possible, especially in van conversions where every pound affects handling. If you’re mounting high on a wall, use heavy-duty fasteners rated for vibration, standard drywall anchors won’t cut it.
Leave at least three inches of clearance on all sides for airflow and filter access. You’ll thank yourself later when it’s time for maintenance in your cramped living space.
Step 4: Run and Connect Ductwork
Connecting your ductwork properly makes the difference between an ERV that works beautifully and one that struggles. Start at the exterior vents and work toward your mounted unit, measuring each run before cutting. I learned the hard way that adding three inches for connections beats coming up short.
For most RV installations, four-inch flexible ducting works well because it navigates tight corners without kinking. Rigid duct delivers better airflow but demands more planning around cabinets and walls. Whatever you choose, keep runs under ten feet when possible. Every extra foot of duct and each bend costs you airflow.
Slide ductwork over the vent collars and secure with metal hose clamps, not zip ties. Zip ties loosen with vibration and temperature swings. Tighten clamps firmly, but not so much that you crush corrugated flex duct. The connection should feel solid when you tug it.
Minimize 90-degree bends by routing ducts along existing chase ways behind cabinets or under benches. If you must bend, use two 45-degree elbows instead of one sharp turn. The airflow difference is noticeable.
Insulate any ductwork running through unconditioned spaces like storage bays. Wrap with standard duct insulation and secure with foil tape, not duct tape, which fails in heat. This prevents condensation in winter and maintains air temperature year-round. Support long horizontal runs with strapping every three feet to prevent sagging.
Step 5: Wire the Electrical Connections
Wiring your ERV is where things get real, and where you need to respect your limits. Most RV-specific ERV units run on 12V DC, drawing power directly from your house battery bank. Check your unit’s amp draw (typically 2-5 amps) and use appropriately sized wire: 14 AWG for runs under 10 feet, 12 AWG for longer distances to minimize voltage drop.
Run your positive wire from a fused distribution panel, never directly from the battery. Install an inline fuse rated 25-50% above your unit’s maximum draw, a 3-amp unit gets a 5-amp fuse. Route wiring through existing chases when possible, securing with zip ties every 12 inches and keeping runs away from sharp edges and heat sources.
Mount your control switch in an accessible location, ideally near other environmental controls. Many units include a simple on/off switch, while fancier models offer variable speed controllers. If your ERV offers shore power operation (120V AC), you’ll need a dedicated circuit, this is when I call an electrician. Working with 120V in an aluminum-framed RV isn’t where you want to learn on the job. I’ve seen too many sketchy DIY electrical jobs at campgrounds, and your safety is worth the professional’s fee.
Step 6: Install Controls and Set Operating Parameters
With the ERV unit wired and operational, it’s time to make it work for your specific van life routine. Most ERV controls mount near sleeping or living areas where you’ll adjust them daily. Start by setting fan speed to medium, this balances air exchange with battery draw and noise levels. If your unit includes programmable schedules, configure it to ramp up during cooking hours (typically 6-8 PM for most van dwellers) and reduce airflow overnight when you need quiet. Humidity sensors should trigger around 60% relative humidity; this catches shower moisture before condensation forms on windows. Label any switches clearly, especially if you’re sharing the space with a partner who didn’t help with installation. Test each setting over several days and tweak based on real-world performance rather than manufacturer suggestions, your cooking habits and travel patterns matter more than generic recommendations.
Testing, Verification, and Fine-Tuning Your ERV System
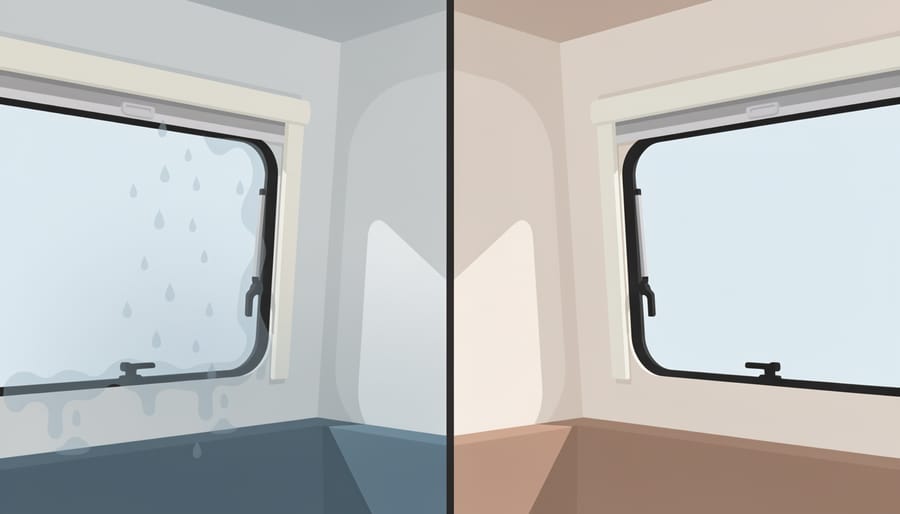
With your ERV unit installed and wired, you’re probably eager to fire it up and start breathing easier. But take fifteen minutes to verify everything’s working correctly, it beats dealing with water damage or poor performance down the road. Here’s how to confirm your installation is solid.
Start by turning on the system and standing outside your RV. Walk around to both the intake and exhaust vents while the ERV runs. Hold a tissue or light fabric near each vent to visually confirm airflow direction, you should feel fresh air pulling in at the intake and stale air pushing out at the exhaust. If the directions are reversed, you’ve got the ducts crossed inside, and you’ll need to swap them.
Next, check every exterior penetration for leaks. Run your finger around each vent cap where it meets the RV surface, feeling for any gaps in the sealant. Then grab a spray bottle with soapy water and mist around the vent perimeters while someone inside watches for drips. I learned this the hard way after my first rainstorm revealed a quarter-sized gap I’d missed during installation.
Inside, listen carefully to the unit’s operation. A properly installed ERV produces a consistent, low hum, think refrigerator-level noise. Rattling indicates loose mounting brackets or unsecured ductwork. Whistling suggests air leaks at connection points. High-pitched whining often means the fan blades are hitting something or the unit isn’t level.
Here’s your complete verification checklist:
- Confirm correct airflow direction at both exterior vents using tissue or fabric
- Inspect all exterior sealant for gaps and test with soapy water spray
- Listen for unusual noises (rattles, whistles, grinding) that indicate installation issues
- Check that all duct connections are secure and sealed with foil tape
- Verify the unit is level using a bubble level placed on top
- Test all controls and switches to ensure proper electrical connections
- Measure voltage at the unit to confirm it matches manufacturer specifications
- Run the system on high speed for 30 minutes and check for overheating
For fine-tuning, start with the fan speed on medium and adjust based on your RV’s size and occupancy. Most van lifers find they need higher speeds when cooking or after showers, then can dial back to low for overnight operation. If you’re getting condensation on windows despite running the ERV, increase the speed or runtime. If the system seems too loud, try relocating it further from sleeping areas during your next modification session, or add foam weatherstripping between the unit and mounting surface to dampen vibration.
Normal operation should be barely noticeable. You might hear the fan cycling on and off if you have humidity-controlled settings, but you shouldn’t feel drafts or hear air rushing through vents. The exterior vent caps should have minimal airflow resistance, if you place your hand over the exhaust, you should feel steady pressure, not pulsing or weak airflow.
Common issues are usually quick fixes. If airflow seems weak, check your filters first, they might need cleaning even on a brand-new unit if construction dust got inside. Unbalanced ventilation (more air in than out, or vice versa) typically means one duct run is significantly longer or has more bends than the other. Adjust fan speeds independently if your model allows it, or shorten the longer duct route.
Maintenance Tips and What to Expect After Installation
Once your ERV is running, you’ll notice the difference within hours. That stuffy feeling after cooking dinner? Gone. The condensation that used to collect on windows overnight? Drastically reduced. Most full-timers report clearer air quality and fewer allergy symptoms within the first week.
Your ERV earns its keep through simple, consistent maintenance. Clean or replace filters every 4-6 weeks depending on your environment. If you’re parked near dusty desert roads or traveling through pollen-heavy spring months, check them monthly. Set a recurring phone reminder tied to the first of each month, it takes two minutes and prevents the system from working harder than necessary. Dirty filters don’t just reduce efficiency; they can strain the fan motors and cost you battery power you can’t afford to waste.
Every three months, inspect your exterior vents for debris, bug nests, or sealant degradation. I learned this the hard way when a wasp nest blocked my intake vent in Arizona, and the system couldn’t pull fresh air properly. A quick visual check during your regular RV walkthrough prevents surprises.
Energy consumption varies by model, but most 12V ERV units draw 20-50 watts during operation. That’s manageable with a decent solar setup, though you’ll want to coordinate run times with your battery capacity. Many van lifers program their ERV to run during peak solar hours or when connected to shore power, then rely on passive ventilation overnight.
Seasonal adjustments matter. Winterize by checking that your ERV’s heat exchanger isn’t collecting frost in sub-freezing temperatures. Some units include defrost modes, learn how yours handles cold weather before you’re boondocking in Montana in January.
The system integrates naturally with your existing roof vents and fans. Run them together during high-humidity activities like showering, or let the ERV handle baseline ventilation while keeping vent fans off to conserve power. You’ll develop a rhythm that suits your lifestyle and climate.
Common Installation Challenges Van Lifers Face
Installing an ERV in a mobile home comes with challenges you won’t find in a house. Power is often the first hurdle. Most ERV units draw between 50 and 200 watts, which doesn’t sound like much until you’re boondocking on a 400-watt solar setup. Your batteries can drain fast if you run the system continuously without adequate charging capacity. Many van lifers solve this by running the ERV only during peak solar hours or when plugged into shore power, then relying on passive ventilation overnight.
Space constraints force creative mounting solutions. Standard ERV units are designed for houses with attics and basements, not RVs with two-inch wall cavities. I’ve seen installations where people mount units in overhead cabinets, under dinette benches, or even sacrifice a wardrobe. The ductwork becomes a puzzle, especially when you’re trying to avoid existing plumbing and electrical runs in those thin walls.
Climate extremes test your installation differently than stationary living. In desert heat, the ERV can pull in scorching air faster than your AC can cool it. In freezing temps, condensation in the ducts can freeze and block airflow. Successful installations often include dampers or manual controls to adjust air exchange rates based on conditions.
Noise becomes amplified in small spaces. A unit that would be whisper-quiet in a bedroom sounds like a jet engine two feet from your head in a van. Add it to your RV maintenance checklist to inspect mounting hardware, because vibration from driving loosens brackets and creates rattles over time.
Frequently Asked Questions About ERV Installation in RVs
Installing an ERV system raises practical questions that every van lifer considers before committing time and money to the project. Here are answers to the concerns I hear most often from the mobile living community.
Can I really install an ERV system myself?
Yes, if you’re comfortable with basic power tools, electrical work, and cutting into your RV’s exterior. The installation requires attention to detail but no specialized HVAC certification, most mechanically inclined van lifers complete it over a weekend.
How much does an ERV installation cost?
Budget $800 to $2,000 for a quality RV-appropriate ERV unit, plus $150 to $300 for ducting, vents, sealant, and mounting hardware. If you hire professional installation, add another $500 to $1,200 depending on your RV’s complexity and regional labor rates.
Will running an ERV drain my RV batteries quickly?
Most compact ERV units draw 30 to 60 watts on low speed, comparable to running LED lights. On continuous low speed with 200 amp-hours of lithium battery capacity, you’ll use about 15 to 30 amp-hours per day, manageable with solar panels or when plugged into shore power.
Does the ERV work while I’m driving down the road?
Yes, though most van lifers turn it off while driving since open windows and road vibration provide natural ventilation. Running it during travel works fine electrically but doesn’t offer much benefit and uses battery power you might need later when you plan your RV trip to remote locations.
Climate adaptability is another frequent concern. ERV systems function in all climates, from desert heat to mountain cold, though their energy recovery benefit shines brightest in extreme temperatures where you’d otherwise lose conditioned air through standard ventilation. The heat exchanger core recovers 60 to 80 percent of the energy from outgoing air, which matters more when there’s a big temperature difference between inside and outside.
The distinction between an ERV and your roof vent fan confuses many first-timers. A roof fan simply exhausts air without bringing in fresh air or recovering energy, you’re dumping your heated or cooled air and replacing it with whatever temperature is outside. An ERV exchanges stale air for fresh while transferring heat energy between the two streams, so you maintain air quality without the energy penalty.
For weekend warriors versus full-timers, the value calculation differs. If you use your RV occasionally and mostly camp in mild weather with lots of outdoor time, a good roof vent might suffice. But if you live in your rig full-time, cook daily, work from your van, or camp in challenging climates, an ERV transforms your indoor environment and pays for itself in comfort and reduced condensation damage within the first year.
You’ve got this. Installing an ERV system might feel like a big project when you’re staring at that blank section of wall, but thousands of van lifers have tackled it successfully, and you can too. The difference you’ll notice in your daily living is real: no more wiping condensation off windows every morning, no musty smell after a week of rain, and genuinely fresher air when you wake up.
I’ll be honest, after installing our ERV two years ago, I can’t imagine going back. Those first few nights, I kept waking up thinking something was different, and it took me a while to realize I was just breathing easier. My partner’s allergies improved within a week.
You’re not just upgrading your rig; you’re investing in your health and comfort on the road. That matters when your home moves with you.
Share your installation story with the van life community. Post your setup photos, talk about what worked and what you’d do differently next time. Your experience helps the next person who’s standing in the RV aisle wondering if this upgrade is worth it. Spoiler: it absolutely is.