
Upgrading your RV stereo takes 2-4 hours and requires only basic hand tools, a wiring harness adapter, and a compatible head unit. You’ll remove your factory radio, connect the new unit using a plug-and-play harness (no wire splicing needed in most cases), and mount it in the existing dash opening. The payoff? Better sound quality, Bluetooth connectivity, smartphone integration, and a system you can actually enjoy during those long highway stretches or evenings at camp.
I learned this the hard way after two years of tolerating a crackling factory system that cut out every time I hit a pothole. That first night with crisp audio streaming from my phone while cooking dinner under the stars? Worth every minute of the install.
The good news for fellow van lifers: modern RV stereo upgrades are more DIY-friendly than ever. Unlike older installations that demanded electrical expertise and custom fabrication, today’s aftermarket head units come with vehicle-specific mounting kits and wiring harnesses that match your RV’s factory connectors. You won’t need to cut wires or decode cryptic color codes.
Whether you’re outfitting a brand-new Sprinter conversion or refreshing a vintage Airstream, this guide walks you through the complete process. We’ll cover what gear to buy, which tools you actually need (and which are overkill), the safety steps that protect both you and your electrical system, and a clear installation sequence that works for most RV configurations. By the end, you’ll have a stereo system that finally matches the freedom of life on the road.
Why Your RV Stereo Deserves an Upgrade
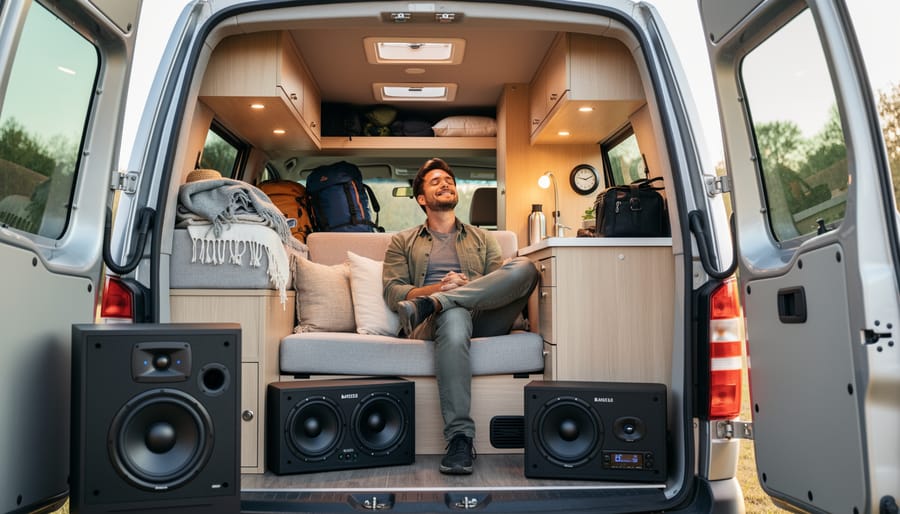
Your factory RV stereo probably does the bare minimum: plays FM radio, maybe has a scratchy CD player, and if you’re lucky, Bluetooth that drops every time you pass a cell tower. That’s not enough when your RV is your home and your music, podcasts, and audiobooks are the soundtrack to your adventures.
A modern stereo transforms how you live on the road. Crystal-clear Bluetooth means you can stream your favorite playlists without static, take hands-free calls with family back home, and listen to navigation prompts without shouting over the engine. USB charging ports keep your devices powered without hunting for adapters. Smartphone integration lets you control everything from your phone, and many units now support Apple CarPlay or Android Auto for seamless access to apps you actually use.
Better power efficiency matters too. Newer head units draw less current than vintage models, which means less drain on your house battery when you’re parked off-grid. That’s a win for anyone serious about boondocking.
I’ll never forget the first night after upgrading my own stereo. We were camped in the San Juan Mountains, and instead of fighting with a weak signal and tinny speakers, I fired up a perfectly clear audiobook while cooking dinner outside. My partner and I sat under the stars listening to a podcast we both loved, the sound crisp enough to catch every word. It sounds simple, but those moments of comfort and connection make van life feel less like roughing it and more like living well. Quality audio isn’t luxury, it’s part of building a space that truly feels like home, one of many easy van life upgrades that genuinely improve your daily experience.
What You’ll Need Before You Start
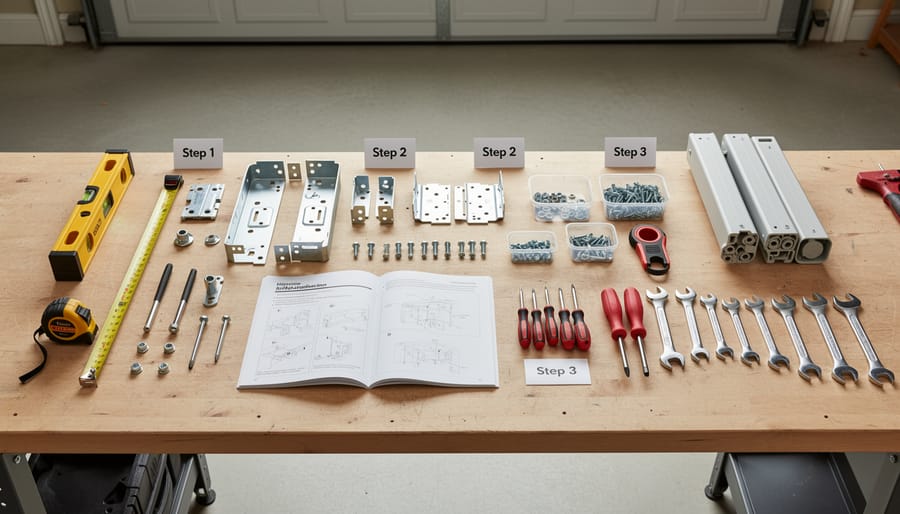
Gathering everything before you start makes the installation flow smoothly and prevents frustrating mid-project trips to the hardware store. Think of this prep stage as part of the DIY upgrades on a budget that enhance your mobile lifestyle, having the right gear means you’ll finish in one session instead of stretching it across days.
- New stereo head unit: Choose one with Bluetooth, USB ports, and smartphone compatibility; single-DIN fits most older RVs while double-DIN offers larger screens
- Wiring harness adapter: Matches your RV’s factory wiring to the new stereo without cutting original wires
- Dash kit: Fills the gap between your new stereo and the RV’s dash opening for a professional fit
- Panel removal tools: Plastic pry tools protect trim panels from scratches and cracks during removal
- Screwdrivers: Both Phillips and flathead in various sizes for mounting brackets and trim fasteners
- Wire strippers and crimpers: Essential for clean, secure wire connections that won’t fail on rough roads
- Electrical tape: Insulates connections and prevents shorts in the tight spaces behind your dash
- Multimeter (optional): Tests voltage and identifies wires if your harness isn’t clearly labeled
- Zip ties and wire loom (optional): Keeps wiring tidy and prevents rattles while traveling
Most van lifers source their stereo units from Crutchfield or Amazon, which often include the harness adapter and dash kit with purchase. Big box auto parts stores carry these items too, though selection varies. Panel removal tools and basic hand tools are worth keeping in your RV toolkit since they’re useful for countless other projects. When choosing your head unit, prioritize Bluetooth quality over flashy features, reliable wireless connectivity matters more than seventeen color options when you’re streaming podcasts through mountain passes with spotty phone reception. If you’re upgrading other systems simultaneously, buying wire and tools in slightly larger quantities saves money and future headaches.
Safety First: Precautions and Stop Conditions
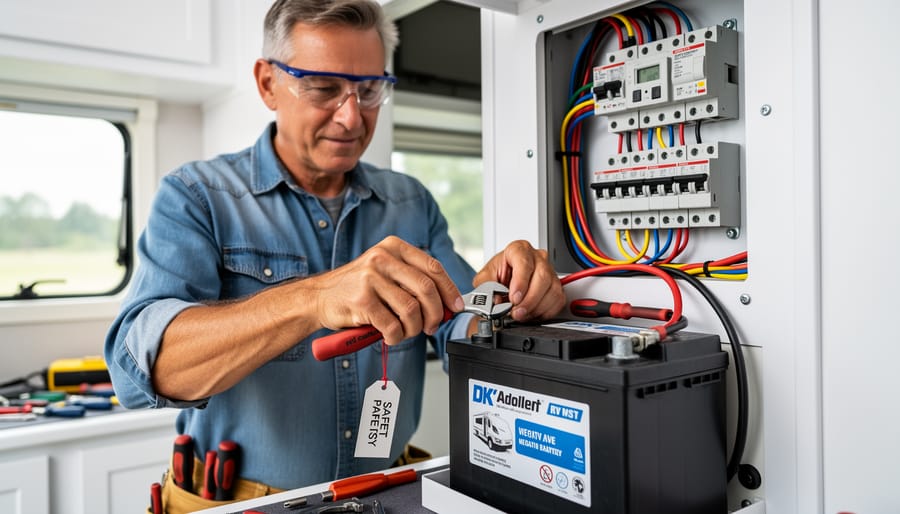
Working with your RV’s electrical system isn’t dangerous if you follow a few essential precautions. The most critical step happens before you touch anything: disconnect the negative terminal on your RV battery. This simple action prevents shorts, sparks, and potential damage to both you and your electrical components. Use a wrench to loosen the cable clamp, lift it off the terminal, and tuck it aside where it can’t accidentally reconnect.
Keep your workspace dry. Water and electricity don’t mix, and RVs can develop leaks you might not notice until you’re elbow-deep in dashboard components. If it’s raining or you’ve recently cleaned the interior, wait for everything to dry completely.
Pay attention to what you’re seeing as you work. Factory RV wiring is usually straightforward, but some manufacturers integrate the stereo with other systems like reverse cameras, GPS, or even climate controls. If you pull out the old unit and find a rats’ nest of unfamiliar connectors, multiple thick harnesses, or labels mentioning SRS (supplemental restraint system), pause. Take a photo and consult an RV tech forum or professional before proceeding. There’s no shame in recognizing when a job exceeds your current skill level.
Trust your instincts. If something feels wrong, smells burnt, or looks damaged, don’t force it. The van life community values self-reliance, but smart DIYers know the difference between a learning curve and a genuine hazard. You can absolutely handle this upgrade safely, you just need to respect the stopping points.
Step-by-Step: Installing Your New RV Stereo
Step 1: Disconnect the Battery and Prep Your Workspace
Starting with the battery disconnect might feel overly cautious, but it’s your insurance against blown fuses, fried electronics, or an accidental short circuit. Locate your RV’s battery compartment, usually in an exterior storage bay or under the hood, and use a wrench to loosen the negative terminal clamp (marked with a minus sign). Remove the cable completely and tuck it away from the battery post. No need to disconnect the positive side.
Back inside, clear your dashboard area of any items that might fall or scratch the trim. Lay a soft towel across the dash and steering wheel to protect surfaces while you work. RV cockpits can be cramped, so consider opening windows for ventilation and better reach angles. If you’re tall, you might find yourself contorted in the driver’s seat, shifting the seat back or working from the passenger side sometimes helps.
Set up a small container for screws and trim clips. They’re easy to lose in the carpet or seat cracks, and you’ll need every one for reassembly. Good lighting matters too, a headlamp frees both hands while you peer behind the dashboard.
Step 2: Remove the Old Stereo
Start by examining how your factory stereo is secured. Most RV head units use one of two methods: spring clips on the sides or mounting screws behind the trim panel. Look for small slots on either side of the stereo face, which indicate clip-style mounting. For these, you’ll need trim removal tools or even bent wire coat hangers inserted into the slots to release the clips while gently pulling the unit forward.
If you don’t see slots, the unit is likely screw-mounted. Use a plastic trim removal tool to carefully pry the surrounding bezel or trim panel loose. Work your way around the edges slowly to avoid cracking the plastic, which gets brittle from sun exposure in RVs. Many factory panels snap in place with fragile clips that break easily if you rush.
Once the stereo slides out a few inches, you’ll see the wiring harness connected to the back. Don’t yank it. Support the unit with one hand while you locate the harness connector. Most have a release tab you press to disconnect. If the connector feels stuck, gently wiggle it side to side rather than pulling straight out.
Leave the factory wiring harness accessible but out of your way as you prepare to connect the new unit. Coil excess wire neatly to prevent it from getting pinched during reinstallation.
Step 3: Connect the Wiring Harness Adapter
With the old stereo out and wires exposed, you’re ready to make the connections that bring your new system to life. This step looks intimidating at first glance, all those colorful wires, but manufacturers use a standard color code that makes matching straightforward.
Your wiring harness adapter acts as a translator between your RV’s factory plug and your new stereo. Instead of cutting factory wires (which kills resale value and makes future upgrades harder), you simply plug the adapter into the existing connector. Then you match the loose wires from the adapter to your new stereo’s wiring harness.
Here’s the basic color code: red connects to red (constant 12V power), yellow to yellow (switched power), black to black (ground), blue to blue (amplifier or antenna remote), and speaker wires pair by color, purple for right rear, green for left rear, gray for right front, white for left front. Each speaker wire has a solid color for positive and a stripe (like white with a black stripe) for negative.
Twist matching wires together firmly, then secure each connection with a wire nut or crimp connector. Wrap each joint with electrical tape to prevent shorts. Give every connection a gentle tug, nothing should pull apart. These joints will endure thousands of miles of vibration, so take an extra minute to make them solid.
Step 4: Mount the New Stereo
With your wiring connected and verified, it’s time to secure the new head unit in your dashboard. Start by sliding the dash kit into the factory opening, it should fit snugly without forcing. If it’s loose or misaligned, double-check that you’ve got the correct kit for your RV’s year and model. Many older RVs have oversized or non-standard openings that require trim rings or mounting brackets to fill gaps properly.
Slide your new stereo into the dash kit until you hear or feel it click into place. Most units use side brackets or a sleeve-mount system. If yours has mounting screws, tighten them just enough to hold firmly, overtightening can crack plastic trim or warp the bracket, creating rattles on bumpy forest roads.
Check that the faceplate sits flush with your dash and all buttons are easily accessible while driving. Press around the edges to ensure nothing wobbles. A secure mount matters more in an RV than a car because you’ll encounter rougher terrain and constant vibration. If there’s any movement, add foam weather stripping behind the dash kit to eliminate rattles before they start.
Step 5: Test and Reassemble
Before you button everything back up, it’s time to verify your work. Reconnect the negative battery terminal, you should hear a soft click or see the stereo display light up when the connection is made.
Turn the ignition to accessory mode and power on your new stereo. Start with the radio: scan through AM and FM stations to confirm reception is clear. Switch to Bluetooth and pair your phone, it should connect within seconds. Test the USB port by plugging in a device; it should charge and play audio if supported.
Gradually increase the volume while listening through all speakers. You’re checking for distortion, crackling, or dead zones that might indicate a loose connection. Play different audio sources, music, podcasts, navigation prompts, to ensure everything routes correctly.
If something’s off, power down immediately and double-check your wiring connections. Once you’re satisfied everything works smoothly, carefully reinstall the trim panels and dash components. Press firmly until you hear them snap into place. Give the stereo a gentle tug to confirm it’s secure, the last thing you want is rattling on rough roads.
Testing Your Work and What Comes Next
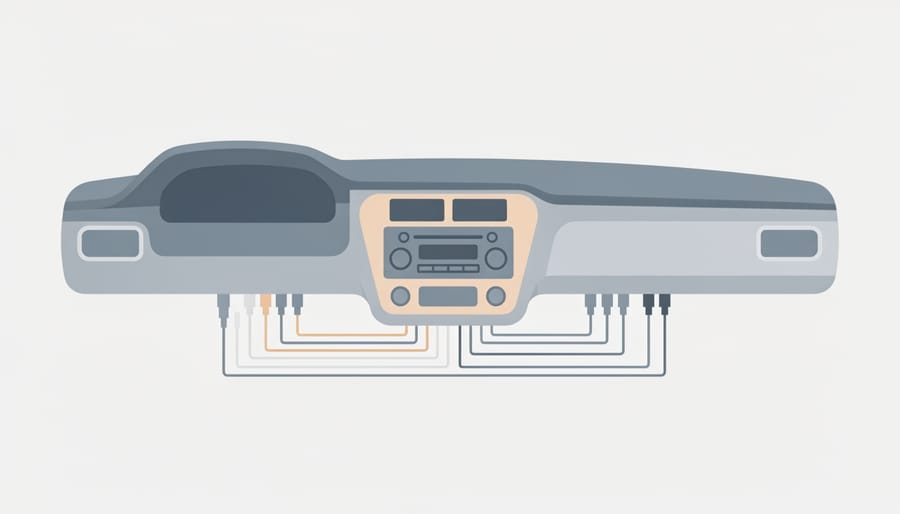
Start with the moment of truth: turn the ignition to accessory mode and power on your new stereo. You should see the display light up immediately. Run through each function methodically, cycle through AM/FM radio stations, test the USB port with a phone, pair your Bluetooth device, and adjust the volume across the full range. Play audio from different sources to confirm every input works as expected.
Here’s your verification checklist to confirm everything is working properly:
- All speakers produce clear sound without crackling or distortion
- Bluetooth connects within 10 seconds and audio plays without dropouts
- Volume and tone controls respond smoothly
- Display is readable in both daylight and nighttime conditions
- USB port charges devices and plays media files
- No warning lights on your RV’s electrical panel
- Stereo powers off completely when you turn off the ignition
If the stereo stays on after you kill the ignition, you likely have a constant power wire connected where the switched wire should be. Similarly, if you lose your presets every time you turn off the vehicle, those wires are reversed. Both are easy fixes, just swap the yellow and red wires at the harness connection.
Once you’ve confirmed everything works, add your new stereo to your RV maintenance checklist for periodic function checks, especially before long trips.
Ready to level up? Consider upgrading your factory speakers next, they’re often the weakest link in RV audio systems. A small powered subwoofer can add surprising depth without draining your battery, and soundproofing materials like mass-loaded vinyl dramatically reduce road noise. If you’re tackling multiple systems, the same patient, methodical approach that worked here applies to projects like following an ERV installation guide.
Give your new system a week of regular use before tweaking EQ settings. Audio components need break-in time, and your ears need time to adjust to the improved clarity.
Common Questions About RV Stereo Upgrades
Can I install any car stereo in my RV?
Yes, most standard car stereos work perfectly in RVs since they use the same 12-volt electrical system. The key is matching the DIN size to your dash opening and ensuring you have the right mounting kit and wiring harness adapter for your specific RV model.
Do I need special RV-rated components?
No special RV-rated stereos exist, but look for features that suit mobile living like strong Bluetooth connectivity, USB charging ports, and good power efficiency. A stereo with a low idle current draw (under 50mA) helps prevent battery drain when you’re not using it.
Will this drain my battery when boondocking?
Modern stereos draw minimal power when off, typically less than a phone charger. If you’re concerned, wire your stereo through a switch or simply turn it completely off when parked. Playing music at moderate volume uses about the same power as running LED lights.
How do I choose between single-DIN and double-DIN?
Measure your existing dash opening first. Single-DIN units are one slot tall and fit almost any RV, while double-DIN units are twice as tall and offer larger screens but require more dash space. If you have a double-DIN opening but prefer single-DIN, you’ll need a pocket or storage tray to fill the gap.
Once you’ve got your new stereo installed and tested, you’re ready to enjoy every mile with better sound quality. Whether you’re listening to road trip playlists while you plan your next campsite or catching up on podcasts during a long highway stretch, that upgraded audio makes your mobile home feel more complete. If your RV has rear speakers and they sound weak compared to the front, you might want to consider upgrading those next or adding a small amplifier to balance the sound throughout your space.
You just did something significant. By upgrading your RV stereo, you took control of your mobile space and made it more truly yours. That better sound quality, those cleaner Bluetooth connections, the USB ports that actually work, these aren’t just technical improvements. They’re the soundtrack to your morning coffee ritual, the clarity in your favorite podcast during a long drive, the music that turns a remote campsite into home.
This upgrade proves you don’t need a professional for every enhancement to your rig. You’ve got the skills and the confidence to make meaningful changes. And here’s the thing: once you’ve tackled a stereo install, you start seeing other projects differently. That backup camera you’ve been considering? The solar panel expansion? The upgraded water pump? They’re all within reach.
The van life community thrives when we share what we learn. Snap a photo of your new setup, post about the challenges you solved, and help the next person who’s weighing whether they can handle this project. Your experience matters.
Every improvement you make to your RV, whether it’s audio, electrical, or comfort, compounds into a space that genuinely reflects how you want to live. The factory setup was designed for the average user. You’re building something better, one upgrade at a time. Keep going. Your rig is becoming exactly what you need it to be.